Friday, May 21, 2010

Chocolate Chip Cookies 5/22


This weekend is Erin's Husband's Birthday. He LOVES chocolate chip cookies. When preparing for the wedding there was a brief discussion about wedding cake then it was decided that there would be no cake, Tim only wanted chocolate chip cookies. 
This week, we decided to figure out the best chocolate chip cookie. Most of the research has already been done in that since Tim loves these cookies so much we've made quite a few. A basic, tried and true stand-by is the Good Ol' Nestle Toll House recipe. Its hard to find something wrong with this recipe, to make an improvement, but people try, well respected people like Martha Stewart, Cooks Illustrated, um...us. Ok, so it's back to Sesame Street and "one of these things is not like the others" but I digress.
We've made the "Perfect Chocolate Chip Cookie" recipe from Cook's Illustrated before. The dough is quite flavorful but when Tim is looking for a cookie, he wants it all chewy, not crunchy (the Cook's recipe is a combo). He also is not big fan of the fancier chocolates that Cook's recommends. He says he still votes for the Toll House recipe.  He prefers the sweetness we guess so we modified (simplified) the Cook's recipe to find Tim's favorite cookie. We made 2 different recipes; the favored toll house and ours.
We started with the Toll House recipe. We made it as instructed. It's supposed to yield 5 dozen cookies! I don't think we've ever ended up with 60 cookies but we followed it as directed at least for the first batch. It calls for 1 rounded tablespoon of dough. 


Now, that's not very much and we wanted bigger chewier cookies. We about doubled the size of the dough balls and were happy with that. Anyone who's made cookies before knows the risk in this practice; siamese cookies. Luckily, we happen to be excellent cookie surgeons or tearer-aparters... 


Our recipe follows the Cook's recipe except for when it comes to complicating the cookie. We browned 10 tablespoons of butter and mixed in the rest to add some flavor to the dough.
 Cook's adds a step here to make the cookie crunchier and add a toffee flavor. We wanted a chewy cookie so we skipped it. There's also a 60% Dark Brown sugar to 40% White granulated sugar ratio instead of equal parts like the Toll House recipe. Again, this adds flavor. Instead of Ghirardelli, which we've used in the past, we went with the same Toll House morsels. Tim just likes the taste better. We can't help what he likes. He does eat a wide range of delicious and fancy to generic foods, from Filet Mignon to Hot Dogs. This just happens to be more on the Hot Dog end of the scale.
These cookies are bigger. 3 tablespoons instead of 1.


We think that they look prettier too.
In a side by side comparison, we like our modified Cook's Cookie better. The dough was nuttier and more flavorful. The bite was more appealing than the thin Toll House cookie. We also liked that the chocolate chip to dough ratio was higher.
In the end though it was up to Tim. Which cookie did he like best? The Nestle Toll House one.  Grr!

Lessons learned: Make them more often. Tim will be happy with any homemade chocolate chip cookie. Literally, he is happy when he has one.  Happy Birthday Tim!

UPDATE:
The Toll House recipe is easy to find but here it is:
2 1/4 Cups All purpose flour
1 tsp. baking soda
1 tsp. salt
1 cup (2 sticks) butter, softened
3/4 cup granulated sugar
3/4 cup packed brown sugar
1 tspn vanilla extract
2 large eggs
2 cups (12 oz pkg) Nestle Toll House Semi-Sweet Chocolate Morsels
We skipped the cup of chopped nuts.

Preheat oven to 375
Combine flour, baking soda, and salt
Beat butter, sugars, and vanilla till creamy then add eggs
Slowly add flour mixture till just combined, then add the morsels
Drop rounded tablespoon (or in our case, closer to 2 tablespoons) on baking sheets
Bake for 9-11 minutes.

We're sorry to report that the other recipe is property of Cook's Illustrated though we adapted it a little. We assume that posting it here would be in violation of their Use poilcy. We can say that their online service is incredibly thorough and helpful in learning to cook or bake and is great for coming up with ideas. They offer a 14 day Free trial and their service is $34.95/year. Their recipe is called "The Perfect Chocolate Chip Cookie" and has loads of info about why they chose each ingredient, quantity, and process. There's no limit to what one can learn from them. We should point out that they are the same people who make the America's Test Kitchen TV show and cookbook that we LOVE.

Monday, May 10, 2010

Mother's Day 5/9

Appropriately, this is the mother of all posts. Why? Because we baked not one, not two but three dishes for our Mother's Day Brunch.

We were looking for a challenge and boy did we set ourselves up for one! It was a great meal that was enjoyed by all but here's how we got to there:

Dish #1: Cranberry and Orange Scones
Now, you've seen us make scones before so we didn't document it. We decided to make these because our Mom really liked the last scones we made and we were already planning on making them when she requested them the day before. We also needed to have a good fall back in case dish #3 didn't work out. More about that later.
Lessons learned: Boys like scones too. They came out really well. Also, make scones more often. It was sooo easy the second time around.

Dish #2: Raspberry Marble Cheesecakes
Our Mom loves raspberries. We knew we wanted to make something with them because we have a great source for them at our local farmer's market (and nearly all farmer's markets in the Los Angeles area), Pudwill Farms. The berries they sell are always sweet, flavorful, fresh and ripe. They cost more than your typical grocery store brand but you're paying for the guaranteed quality in that "They were just picked yesterday!" and won't go bad immediately. Plus our Mom deserves the best.

The recipe comes Martha Stewart's Cupcakes book. This is a really great book that she put together. There are a lot of collaborators and fantastic ideas to creat amazing cupcakes. The best thing about it is that it is easy to use and really emphasizes a "Can do" element that we like to promote. The recipe for the big version can be found here.
We have experience with Mini cheesecakes. Everybody likes them. We had a little snafu with the oven as while we were preheating; we discovered it wasn't clean. We didn't want to relive the smokey superbowl pudding, so we prepared the graham cracker crust in the toaster oven while we waited for the big oven to cool. Yes, our toaster is big enough to fit a 6-muffin tin. We call it "The Toaster that Ate Chicago." It worked out for the crusts because it took less than 5 minutes a batch but baking all 32 cakes in there would have been ridiculous. So, we cleaned the big oven.
Most of the process was easy and fun. We pureed the raspberries and strained them.

Then we put a tspn of the puree on top of the cakes and swirled it around with a tooth pick. Pretty!

This recipe calls for baking them in a water bath; placing the cupcake tin in a pan of hot water in the oven. This is to prevent the surface from cracking and to preserve the delicate creaminess of the cheesecake, but we're not convinced it's entirely necessary. We prepared the first batch in this fashion and found that they took a really long time to cook. This is probably because we took to long to get the cheesecakes into the oven after pouring the water in. By the time it went into the oven, it wasn't even close to hot. This caused the baking time to more than double! Oops! Plus it was a little nerve racking trying to maneuver the tins and not splash the water onto the cakes.
For the last two batches we just put them on the rack and they came out fine. No cracks and still creamy... We're willing to try that step again but we're not sure that we'll become faithful bathers. Wait, that didn't come out right...
We were happy with the cakes.
Lessons learned: We would use a little more graham cracker crust and a little more raspberry puree but these are tasty as is. 

Dish #3: Souffle
When we tell people about our blog, a lot of the time they say "oh, like 'Julie and Julia'!" I hadn't seen the movie before beginning this but knew the concept. Since we get the comparison a lot, we decided that we should make something from "Mastering the Art of French Cooking." After this experience we  think that Julia Child is a great cook, Julie Powell is crazy and admirable for doing that, and we are not inspired to cook any thing more from that book but would rather learn French. I'll explain: we found Mrs. Child's book incredibly hard to use. There is A LOT of information there but we were flipping back and forth to understand how to make the Bechamel Sauce (which I screwed up), or where to add the egg whites (which I screwed up). We understood from the onset that making a souffle is a complicated process but "Mastering the Art of French Cooking" did not help. Just reading it made us more nervous. My favorite part was just reading the recipe names with a French accent: Souffle au Fromage, Souffle aux Epinards, Souffle de Poisson but then we started singing "Les Poisson" from "The Little Mermaid" and got sidetracked.
Our standby was no help either, "America's Test Kitchen" just said that souffles are "temperamental and difficult to prepare" so they developed a user friendly version. We wanted the real thing. Maybe we could have studied more but here's how it went:
This is the beginning of the Bechamel Sauce. It's easy enough, melted butter, and flour. We heated it up and then added boiling milk.

Then the eggs get separated and the yolks are supposed to go in here with one extra egg white with the rest to get whipped. I wasn't paying attention to the yolk part and threw most of them away. I was able to put 1 egg yolk into the sauce. We just called it a low-cholesterol version and continued. :o)
We thought that a Spinach and Leek quiche sounded lovely so we sauteed them up and added them to the sauce.

Then there was the egg whites. After our last experience with whipping egg whites, we were trying to be extra careful. We learned from our research with Julia that if there's even the slightest bit of egg yolk in with the whites, they won't whip up properly and we think that's what happened last time. This time, we were really good about separating the egg whites but that is about as far as the success went.
Yup, you guessed it. This is a classic example of over whipped egg whites. We are not yet one with our Kitchenaid mixer. Julia says that the way to save this is to add another egg white but we used all the eggs in the accidental yolk wasting so we had no choice but to go with it. 
We mixed a 1/4 of the egg whites into the sauce and then folded the rest in and topped it with Gruyere cheese (by the way the pan we used was prepped with butter and Gruyere so it surrounds it.)


Sara immediately noticed that it could be more even but the recipe stressed not over-mixing it so it just went into the oven.
It looked pretty great, it tasted pretty great. Isn't it classic Julia Child to say something about acting cool cause only we know what happened in the kitchen? Oh wait, we have a blog, darn! Well, you know it all now but it was still a success. I think we might try it again one day but for now, we'll take our lessons and be happy our Mom enjoyed it for Mother's Day.

Lessons learned: All of the egg gets used and we need some practice at whipping egg whites. Leeks are a great way to flavor an egg dish. 


Tuesday, May 4, 2010

Lasagna 5/2

Lasagna.  Who doesn’t like lasagna?  It feeds a group, its filling, and its tasty. And people have been asking us to find a great recipe for it so, here it is folks!


Reading the recipes for lasagna made it seem like this was going to be a long process but we thought it couldn’t possibly take as long as it takes to make a frozen lasagna.  This recipe is more cooking and less baking than a cake or such because there is less chemistry going on, but that allowed us to manipulate the ingredients some and kick up the flavor(more crushed red pepper please).

A lot of recipes called for ground beef and ground pork (or even meatloaf mix) but we liked the idea of sausage so we did a combo of recipes from Cooks Illustrated to make both the sauce and cheese mixture.

As reviewed by America's Test Kitchen, we used the Barilla Oven Ready Lasagna Noodles.  The instructions in the "America's Test Kitchen Family Cookbook" show that the noodles are laid down next to each other but the Barilla website method makes much more sense. Ours came out really good anyway, but you can use more noodles if you like.

Ingredients:
Sauce
1tbpn Olive Oil
1lb Italian Sausage (we used mild Johnsonville)
1 Can (28oz) crushed tomatoes
1 Can (28oz) diced tomatoes
1 tspn of salt
6 cloves of garlic
1 onion
1/8 tspn red pepper flakes (we used 1/2 teaspoon)
1/4 tspn oregano (we used 1/2 teaspoon)
Salt and pepper to taste (it tasted GOOD!)

Cheese mixture
1 cup parmesan
15oz ricotta (whole fat)
1/2 cup fresh chopped basil
1 egg
1tspn salt
1tspn pepper

Plus you will need 1lb of mozzarella and another 1/4 cup of parmesan for the assembly of this luxurious lasagna.

Preheat to 375. Hint: Put a baking sheet on the middle rack so they juices don't leak into the oven like ours did.

The sauce was made first because it takes a good 25 minutes of simmering to get it thick enough.  We were very focused on that, so much so that we forgot to add the sausage. But thankfully this is cooking and so there was some room for error. If we made a cake and forgot the flour, we would have had to start all over. This time, we just browned the meat (with olive oil) and then added it to the sauce. :o)
The onion was softened in the olive oil with the salt in a medium saucepan over medium heat. The garlic was added to the onions and cooked till fragrant (about 30 secs). Then pour in the tomatoes and spices. Then in our case, add the meat ha ha. Don't try this at home, I mean I guess you could but it would be best to brown the meat first with the onions. Simmer until thickened (about 25 minutes) but make sure there's still juice enough to cook the noodles.


The cheese mixture is pretty easy to whip up after chopping the basil. You just mix it all together. Mmmm cheesy!


So here's what we were talking about in the assembly. Here's a pic of how we layered it:


Sauce, not enough noodles, cheese mixture (1 heaping forkful per noodle and spread until even), shredded mozzarella, sauce, repeat 2 times. The last layer gets sauce, mozzarella and parmesan.

Spray a piece of aluminum foil with cooking spray and tightly cover the lasagna. And now, for the baking part: put it in the oven.
After 15 minutes, take the foil off. After about another 25 minutes, it'll be ready when the cheese has browned a little and the sauce is simmering.

Allow the lasagna to cool before serving.  It serves about 6 - 8 people. ENJOY! 


Lesson learned:  When cooking, it can usually be fixed.  Homemade lasagna doesn't take anywhere as long as frozen store bought and it is oh so yum!

Sunday, April 25, 2010

Pretzels 4/26

April 26th is Pretzel Day! Ok, so maybe we like to celebrate stuff ok? Not everyday is a holiday but we like to bake and it's a way to celebrate.
Trader Joes used to sell these pretzels that had sunflower seeds in them and they were YUM! They were a great snack food for kids (camp counselor tested) and it was a tragedy when they stopped selling them. They said that not enough people were buying them but we (plus a whole lot of people we know) would have bought a pallet of them if that meant that they'd still be around today.
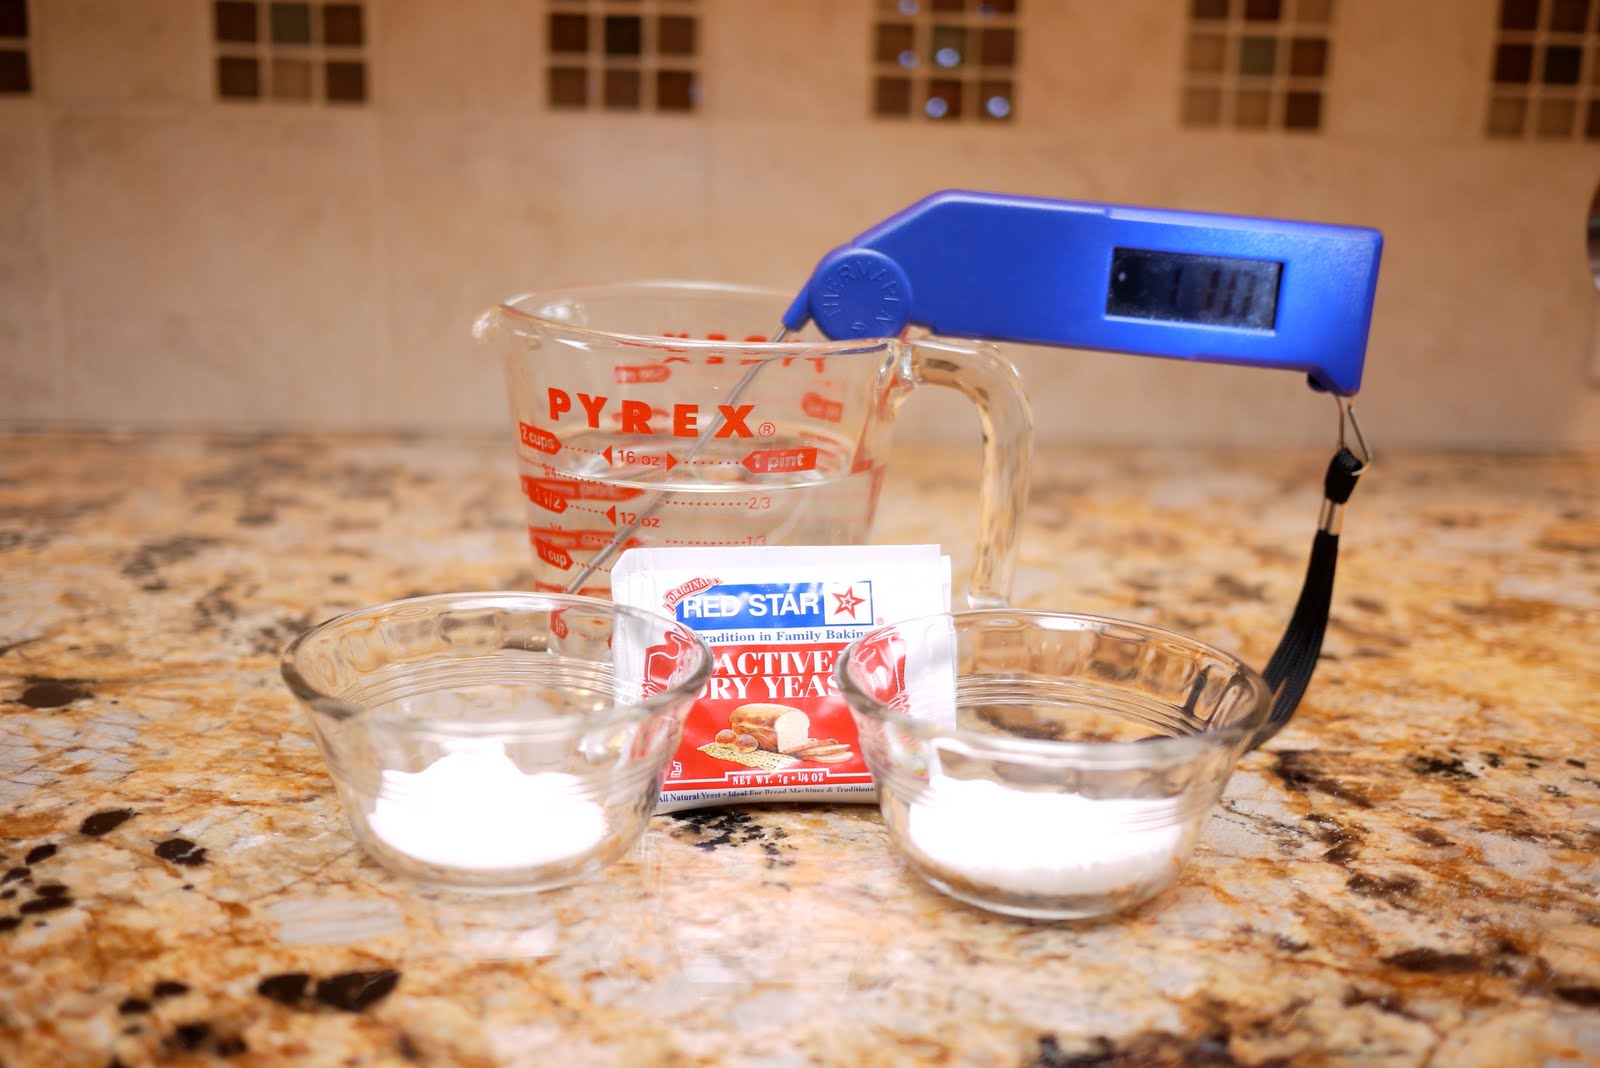
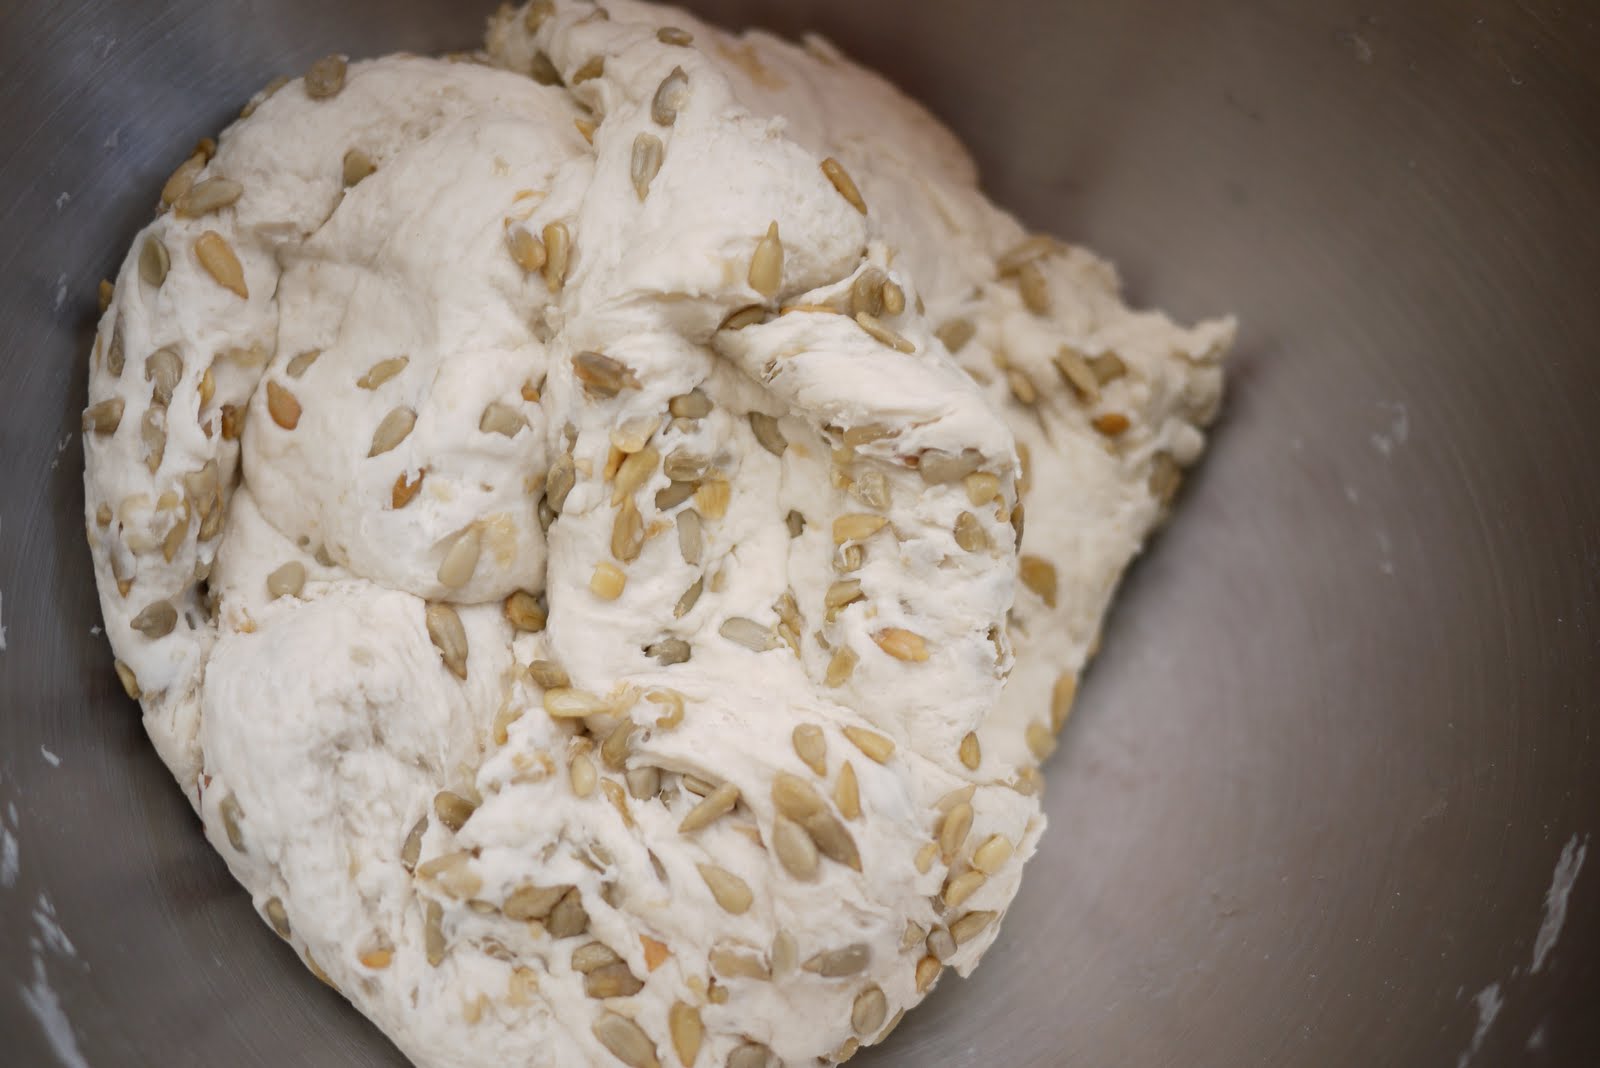
We decided to take matters into our own hands and are making some sunflower seed pretzels now. Alton Brown's hard preztel recipe seemed promising so we went with that but added sunflower seeds. So the ingredients list is:

  • 1 tablespoon sugar
  • 2 teaspoons kosher salt
  • 1 package active dry yeast
  • 22 ounces all-purpose flour, approximately 4 1/2 cups
  • 1 large whole egg yolk beaten with 1 tablespoon water
  • vegetable oil, for pan
  • Water
  • Pretzel salt (or ground sea salt that we used)
  • 3/4 cup of roasted unsalted sunflower seeds
  • Everything we did was the same as Alton's recipe except after the dough was mixed, we added the seeds and then let it rise. 


We have to admit that it seemed pretty scary when the recipe called for dropping the pretzel dough in boiling water and then remove them and place on sheet pans. Sounds so simple, but in practice, it was a little more than that. 

We used forks to get them out and there were a few that fell apart. The recipe calls for them to be 14"-15" and we're not so sure how to execute that. Ours were much shorter. What tools would you use to get a 14"-15" noodle out of boiling water and keep it straight?
It wasn't so bad but again, ours were shorter. Then, they were brushed with the egg mixture and salted.

Then into the oven for 60 minutes!

They didn't come out the way Alton's looked but the were hard and salty. They looked more like bread sticks but they had the nutty flavor that we were looking for from the sunflower seeds. They were a little soft in the middle but overall, quite enjoyable. 

Lessons learned: If we were to try this again, we might be more diligent about making them skinnier to see if they'd be darker and crunchier. But, they tasted this way too.


Thursday, April 22, 2010

Earth Day Brownies 4/22

So, today is Earth Day and we made brownies for it. Sorry this post is a bit late in the day, but work got in the way, the weather wasn't cooperating and we aren't thrilled to share with you that our plan didn't work out so well.

For this occasion (which happens to be the 40th Anniversary of the holiday BTW), we decided that there wasn't anything more environmentally friendly than baking with a solar oven. No, we don't have a new exciting recipe to share, and it's kind of nerdy but what do you expect from a blog called "2010: A Bake Odyssey?"

We started building the oven late last week. We used 2 cardboard boxes, one smaller than the other and put Styrofoam between them to provide some insulation.


We used another sheet of cardboard lined with aluminum foil to provide some reflection. We obtained a piece of glass from a garage sale and put it over the oven for a "greenhouse effect". When testing it out on Saturday afternoon, we reached a temperature of 150 degrees Fahrenheit.


We hoped for better and went and bought black poster board to line the inside of the oven and draw in more heat. In the spirit of the project, everything but the poster board and the foil was previously used.
The next day, in a test at about noon, the oven got up to 227 degrees F. Then we dawdled for a little bit and didn't get the brownies in there till about 2.

(This isn't what they looked like when they were done but pretty close. Imagine them with a tan.)


It was still pretty sunny with a few clouds. The oven got up to 202 degrees F and the brownies themselves were heated up to 161 degrees before the clouds rolled in and the temperature dropped rapidly.

(Booooooooo!)

They were only in there for a little over an hour. According to the FDA, eggs are satisfactorily edible if cooked to 145 degrees for 15 seconds. We reached that but we didn't achieve brownies. They were not even close to cooked through. We had to finish them in the real oven and that defeated the whole purpose. We were disappointed, especially since it's been gloomy and/or rainy for the last three days. We didn't even have a chance to redeem it. Well, we haven't given up anyway. We believe that this is possible and we are gonna make it happen.  We'll update this post with the next attempt and hopefully success. Till then, be green and Happy Earth Day!

Monday, April 12, 2010

Glee Cupcakes 4/13

Update: Our Glee Cupcakes were named #2 on the "20 Most Inventive Cupcakes Known to Man" by koldcast.tv Also, due to the response and requests to make these cuties, there's another update further below to help explain the process.

We are Gleeks and we are proud of it. We are fans of Glee and enjoy every second of it. Glee returns today and we couldn't be more excited. To celebrate its return, we are dedicating a Post to it. We present to you: Glee Cupcakes.


On the show, the Glee kids are considered unpopular and targets for teasing. The main attack is what is called a slushie facial. The football players throw slushies in the faces of the poor Glee Club students. So, not that we condone this sort of behavior but our cupcakes are meant to look like the slushies. We even watched the episodes closely to see that they are called "Big Quench" as opposed to "Big Gulp".
We've been planning this for months. The cupcake challenge was involved too. As has been said before, we do not believe in looks over flavor. We could not let the presentation be better than the taste.  The cupcake challenge yielded a chocolate cupcake as the winner. That doesn't work so well for a slushie cupcake. The vanilla cupcake came in last place at the challenge but we liked it. We did some research, made some improvements and went for it.  Our recipe was a combination of the amended Magnolia Bakery recipe from Cast Sugar and the highly praised one from 52cupcakes.blogspot.com. We went with the following ingredients:
1 3/4 cups cake flour
1 1/4 cups unbleached all purpose flour
2 cups sugar
1 tbspn baking powder
3/4 tspn salt
1 cup unsalted butter
4 eggs
1 cup yogurt
2 tspn vanilla extract
Then we followed the steps on the 52 Cupcakes site. 


The decoration was the next big step for us. We made the frosting and then split it into 3 bowls. We planned on dyeing one blue, one red, and one purple to match typical slushie flavors.


Then we topped them with colored sanding sugar in the same color. 

UPDATE (more details): Then they went into the cups.
We cut down 9oz plastic cups to the point where the cupcakes don't slide into the cup anymore. Then we wrapped the labels that we made around the cups and tucked the ends into the cup.


We have to say they came out super cute!!


Happy return of Glee, everybody!

Lessons learned: We don't use as much frosting as most recipes call for, we ended up with A LOT left over. Cake flour is great for cupcakes, we ended up with a nice soft texture that we were aiming for.

Sunday, April 11, 2010

Flourless Chocolate Cake 4/8

This recipe came about for a couple of reasons.  1) Erin has a couple of co-workers that are on gluten free diets and have been wanting to try our creations.  2) I was on a strict diet a few years ago where I couldn't eat wheat and I didn't find wheat free food that tasted that good.  At lot of gluten free recipes use lots of specialized flours and sweeteners so we thought we would eliminate the extra ingredients (that we probably won't use again) and go with Flourless Chocolate Cake.


I have to admit to my addiction to Baking/Food Blogs.  I love looking at the pictures, reading the recipes, and witty commentary.  It is helpful to plan what we are going to make next.  I have come across a few recipes for Flourless Chocolate Cake and they looked so good.  The recipe from Gluten Free Goddess looked both simple and yummy.


The consistency of the batter was like a thick soup.  Being that this cake has no flour, this is more like Chocolate Souffle than Cake with all the eggs (8 in all).


The whole cake raised up pretty high as you can see but it did settle down nicely.


Because the recipe called for Strong Hot Coffee, the cake came out tasting kinda like a mocha.  The gluten free people at Erin's work liked it and because it is so rich the pieces went a long way.


Lessons learned: Hot coffee and food processor equal melted chocolate in a jiffy.  Although this has a long bake and chill time it is a pretty easy recipe over all.


On an unrelated side note....  Erin and I baked this weekend for a close friend's birthday.  Usually we are a good team when it comes to tag teaming a recipe however we kinda goofed on our first attempt at making dark chocolate cupcakes.  When mixing the recipe, we thought the other had measured and included the sugar. Neither of us did.  Instead of yummy cupcakes we had lumpy tasteless rocks.  Those of course, went straight into the trash and a new batch was made.  A definite lesson learned:  Forgetting the sugar doesn't mean sugar free and still good.  Baking is about chemistry. Both in the baking and in the teamwork.